
  |
| Previous page | Techniques & KB Articles | Next page |
| Using Custom Fonts | ||
Using Custom FontsneatComponents gives you easy access to a number of fonts via the Behavior Editor - Style section. These are built into the system, and are ready to be used.
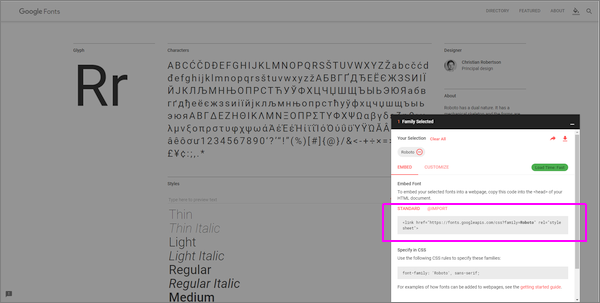
The Behavior Editor is a powerful CSS interpreter that also makes it easy to include other fonts - custom fonts - of your own. Call the font or Install the fontThere are two methods of accessing custom fonts. You can call the font on use from an online repository such as Google Fonts, or you can install the font within the application. Calling the font is a simple procedure, but it relies on the responsiveness of the remote server and the Internet connection. In most cases these services are responsive enough not to cause a significant delay in rendering the page. In situations where you do not have direct Internet access - say in an intranet application - or where the connectivity is poor you can install the font within the system. How to call a custom fontSelect your desired font from a repository - Google Fonts is a useful source. This example uses Roboto from Google Fonts.
Find the embed code:
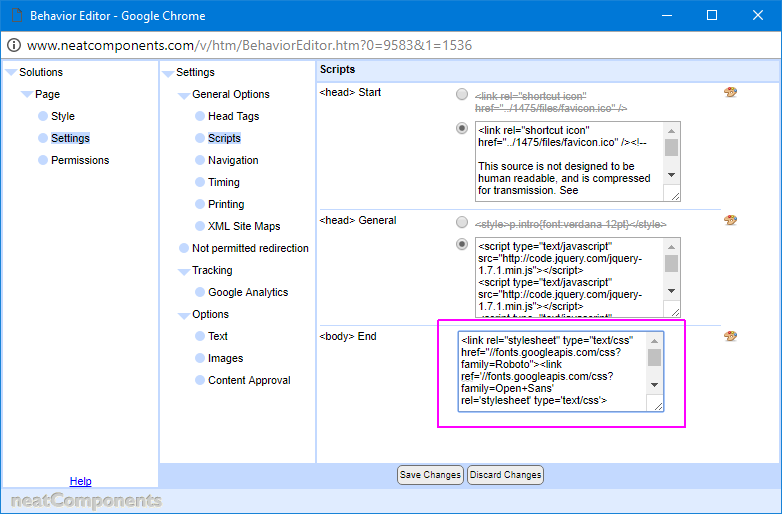
Copy it, and modify it slightly by removing the https: thus: <link href='//fonts.googleapis.com/css?family=Roboto' rel='stylesheet' type='text/css'> And place it in one of the Script setting dialogs in the Behavior Editor | Settings
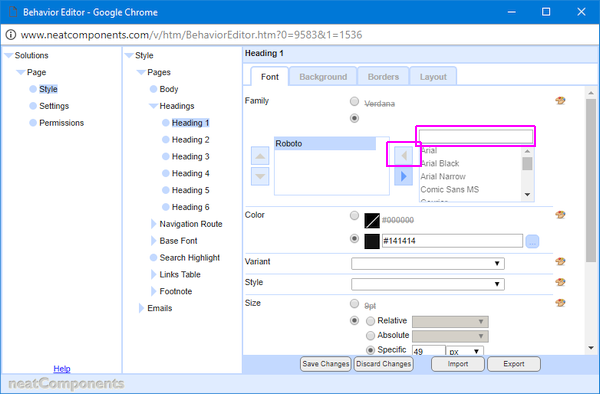
Note that you can include more than one font, as shown in the example. The font is then called in the Style section of the Behavior Editor for the component, by writing it in to the highlighted box and clicking the [<] arrow to make it available.
Normal Style inheritance rules apply so this Font will be available to all children of the component. Applying the custom font to the highest point of the Layout Manager tree (Globe Behavior editor) makes it available to all children of that Component type.
How to install a custom fontThe rest of this KB article uses as an example a Font with a commercial free-to-use license: Source Sans Pro from FontSquirrel, but there are many other sources of fonts. We are going to show how to install just one font face: Source Sans Pro Regular
and we will use the @font-face <style> capability to do that. There are lots of guides to using @font-face available, and they explain in detail the reasons for what is done.
A key aspect is that to enable the best cross browser compatibility you need to obtain and upload the .eot, .svg, .ttf and .woff files for each of the faces you will be using. Your font supplier should provide those, or they may have a webkit for generating them on demand. Upload Use an Upload Component to upload the font files. In this example we are uploading: sourcesanspro-regular-webfont.eot
sourcesanspro-regular-webfont.svg
sourcesanspro-regular-webfont.ttf
sourcesanspro-regular-webfont.woff
Once uploaded we are told that the file location is:
C:\Program Files (x86)\Enstar\neatComponents\wwwroot\sites\0000\10\files
indicating that the required path is: /10/files/ @font-face Format
The @font-face format is: @font-face {
font-family: 'FontName';
src: url('fonts/FontName.eot');
src: url('fonts/FontName.eot?#iefix') format('embedded-opentype'),
url('fonts/FontName-webfont.woff') format('woff'),
url('fonts/FontName-webfont.ttf') format('truetype'),
url('fonts/FontName-webfont.svg#FontName') format('svg');
font-weight: normal;
font-style: normal;
}
Behavior Editor
The @font-face content needs to be placed inside a <style></style> tag and inserted into the Behavior Editor, Settings, Scripts section ...thus: <style>
@font-face { font-family: 'sourcesanspro-regular';
src: url('/10/files/sourcesanspro-regular-webfont.eot');
src: url('/10/files/sourcesanspro-regular-webfont.eot?#iefix') format('embedded-opentype'),
url('/10/files/sourcesanspro-regular-webfont.woff') format('woff'),
url('/10/files/sourcesanspro-regular-webfont.ttf') format('truetype'),
url('/10/files/sourcesanspro-regular-webfont.svg#sourcesanspro') format('svg');
font-weight: normal;
font-style: normal;
}
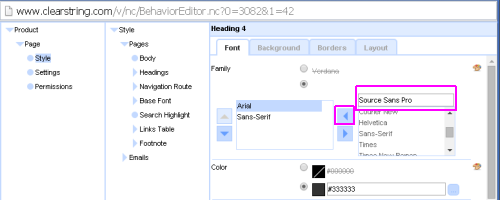
</style> Write-in font
The font can then be called from the normal Font dialog simply by writing in the matching font name in the Custom name entry - as indicated in the image above.
|

|
