neatComponents allows the use of complex JavaScripts to produce page effects.
A common method is the use of jQuery. The example below is for Lightbox, and we also provide other worked examples of jQuery using the same techniques.
Detailed examples are:
Using Lightbox for customized image display
Creating an image slider (Demo application provided)
Displaying a Google Map using co-ordinates from a Record
Using GeoRSS to show multiple markers on an embedded Google Map
Using Google Website Optimizer
Using jPlayer to deliver Audio and Video files
Using Chart.js for charts and charting data output
General method
In each case the script is inserted into the Scripts section of the Behavior Editor for the page, and then is called from the page body via the Text Editor Source-view.
Note that there may be more than one script inserted, and that scripts follow the normal rules of Inheritance.
Typically you also use the Upload Component to upload the core '.js' and .css files and adjust the file locations given in the examples to suit your instance.
Some on-page 'HTML' is entered in the 'Source' view of the Text Editor to call the script (specified in the Behavior Editor) that uses the .js and .css files to produce the effect.
A jQuery Example - How to integrate with Lightbox
Lightbox is a 'simple unobtrusive jQuery script used to overlay images on the current page'.
Lightbox is licensed under the Creative Commons Attribution 2.5 License
For full details and original source files, see:
http://www.lokeshdhakar.com/projects/lightbox2/
In operation, clicking on a link will dim the page, and use a transition effect to show the image in a layer overlaying the page.
How to integrate Lightbox into your site or application.
1. Download the set of Lightbox files from here: lightbox.zip
Unzip the file to see the set of files involved.
2. Create an Upload component
In the Layout Manager add an Upload component to the site. Name it Lightbox, and place it in a configuration area of your site.
3. Note the page number of the upload component.
4. Modify lightbox.css and lightbox.js in the set downloaded in stage 1.
Open each file in a simple editor (eg Notepad), and do a file-and-replace:
Find: replaceme
Replace with: nnn
where nnn is the page number of the Upload component.
5. Upload the set of files you unzipped, including the two modified files, into the Upload component.
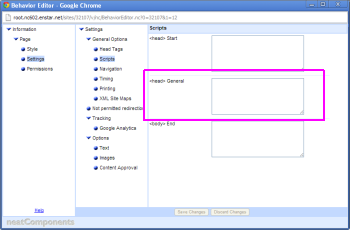
6. On the page where the effect will be seen, in the Behavior Editor, Settings, General Options, Scripts, enter:
<script type="text/javascript" src="../replaceme/files/prototype.js"></script>
<script type="text/javascript" src="../replaceme/files/scriptaculous.js?load=effects,builder"></script>
<script type="text/javascript" src="../replaceme/files/lightbox.js"></script>
<link rel="stylesheet" href="../replaceme/files/lightbox.css" type="text/css" media="screen" />
and in this, as for the earlier files, change 'replaceme' for the page number of the Upload component.
7. There are then two ways in which you can activate the effect:
- On an individual link
- On a set of links in a Query
On an individual link
In the text editor, select the copy that will be clicked on, and open the Link Picker.
Select 'Document', and upload the image that will appear.
In the 'Rel' box, enter 'lightbox' (without the quotes)
To show a caption under the large image, enter the caption text in the Title field
On a set of links in a Query
Ensure the Query contains both the field that will be clicked on, and the field containing the image that will be displayed.
On the field that will be clicked on, edit the on-click properties, and select the image field as where it links. In the 'Rel' box, enter 'lightbox' (without the quotes)
To show a caption under the large image, choose the field containing the caption text in the Title field.